This is default featured slide 4 title

Go to Blogger edit html and find these sentences.Now replace these sentences with your own descriptions.

This is default featured slide 5 title

Go to Blogger edit html and find these sentences.Now replace these sentences with your own descriptions.

Monday, November 29, 2010

Tandoori Whole Chicken Roast / Bake for Thanksgiving - Indian Style!


Hope everyone had a fun and enjoyable Thanksgiving! and even more fun shopping on Black Friday!
Didn't do much shopping this year, instead went out to friend's place and then to the children's musuem! The kids had lots of fun for sure!:)
Did some cooking on Thanksgiving, but wanted to try out a whole chicken baked in the oven. Been wanting to give this a try for a very long time. I did try this out once and it didn't come out that good, the meat even got too dry.
This time around, I wanted to give it a try once again, and it did come out better or should I say much better...lol:)
It didnot dry out for sure, and even the color was good.

Prep: (Marinate the Chicken the night before)
The night before, I washed the chicken inside out. Wash it again with little turmeric and salt.
I kept the skin on, because I think it helps in keeping the moisture in. Slowly remove all the attachment between the skin and the muscle, to make like a pocket. This should be done all over, the chicken breasts, thighs and legs. Even the wings if possible.
With a fork, punch holes all over under the skin (not too many). This will let the masala to seep in to marinate.

Marinade:

1 cup yogurt
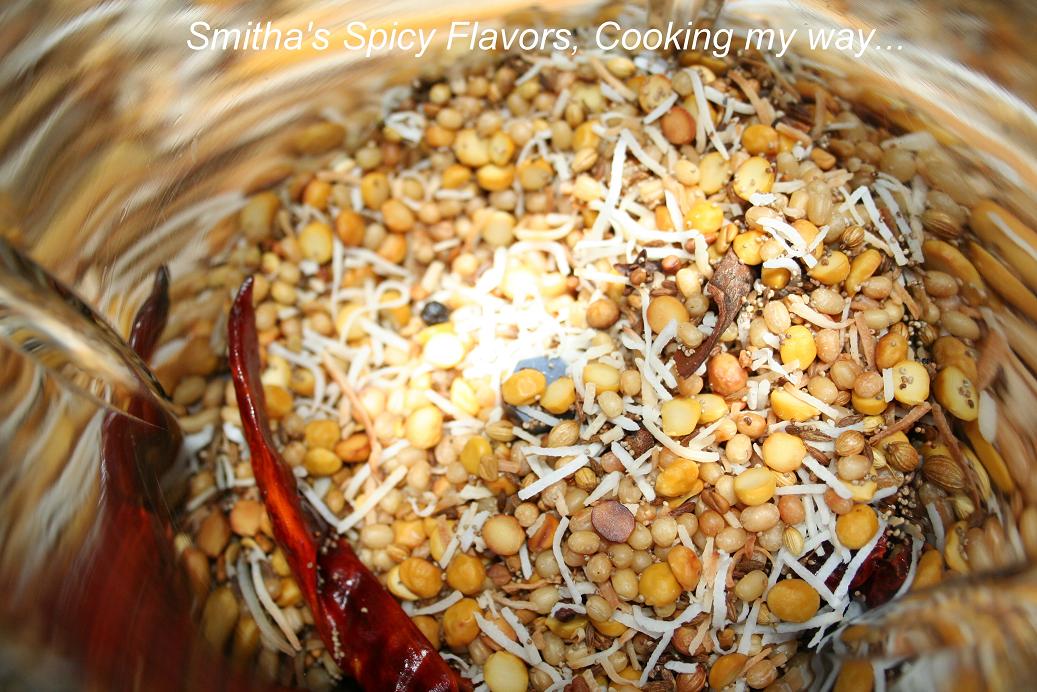
2 - 3 tbsp Shan Tandoori Chicken Masala powder ( or any masala you prefer)
salt to taste
2 tsp chilli powder
1 tsp turmeric
1 tsp coriander / dhaniya powder
1 tsp jeera / cumin powder
1 tsp garam masala powder
juice of 1 big lemon

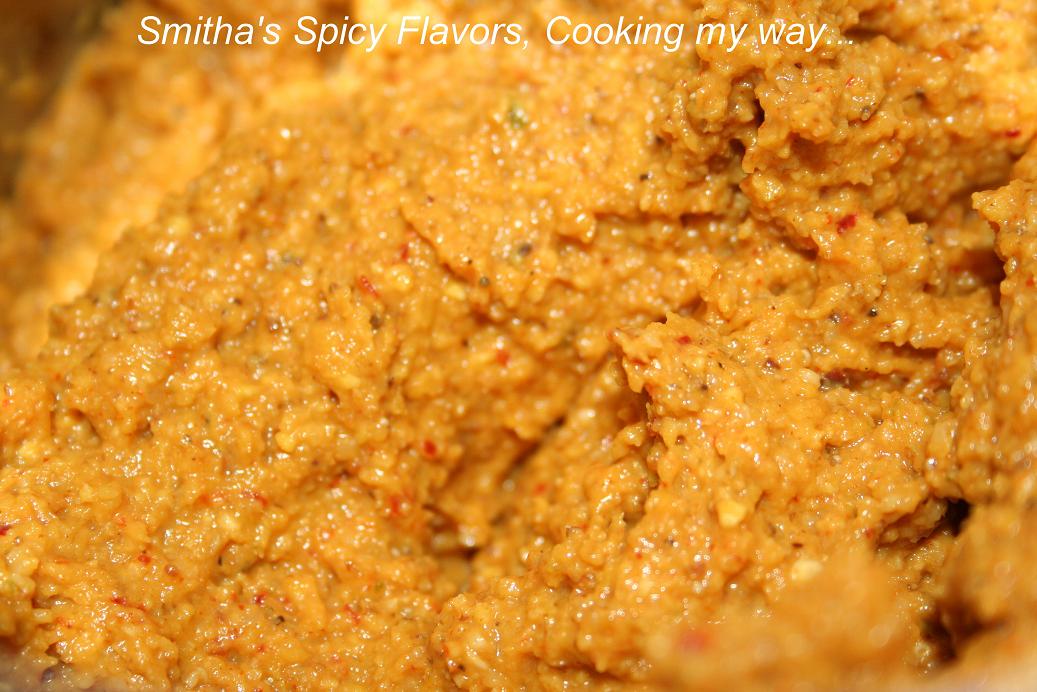
Mix this into a paste. Taste for salt, as you cannot add later. Adjust any if necessary.
Rub this paste onto the chicken, under and over the skin. On the muscles and meat. Inside the hollow, that is inside the chicken hollow. The whole chicken should be covered with this masala.
Place the chicken in a tray and cover with plastic wrap. Refrigerate overnight.


Baking: (the next day)

Remove and let the chicken come to room temperature (atleast 1 - 2 hours).
If you want, you can tie the legs together (so that they will stand up). I just placed metal skewers thru the legs.
The chicken did take a long time to bake. Preheat and Bake @ 400 degrees F.
It took about 2 to 2 1/2 hours in the oven. I baked until the internal temperature came up to 160 F.
Baked with a foil on top for about 1 hour, with a turn in between and another 1 hour or more with out the foil, but turning every 20 minutes. Check for temperature! Best way to see if its cooked.
Only once thru the whole process, I used excess of the masala marinade to brush on both sides of the chicken, that is after the first 1 hour.

It did come out beautifully baked and tasted great. Now I am confident to try it out more. This time I used a simple marinade and no stuffing too. Maybe next time I can try out a Indian-style stuffing too.
Sorry, didn't have much time to decorate the chicken and take pictures...had to do it quick as kids were waiting at the table!!!
So go ahead and give a try. If you are like me 'scared as to how it will come out'...I am sure experience will help for 'the next time'.
Enjoy!!!


This is going to the Chicken Recipes event @ My Culinary Creations

Wednesday, November 24, 2010

Coriander Onion Chutney for T&T


When I saw this chutney on Priya's blog, I knew I had to have this and lucky me T&T was also announced around the same time. So I went ahead and made this.
Its a very easy chutney to make and goes good with all kinds of dosas, idlis and even with hot rice.
This chutney doesn't have the raw onion taste since it cooked a little before making the chutney, so people who don't like the taste of raw onions, like me, don't have to worry. :))

This Month Priya's Blog Priya's Easy N Tasty Recipes is up for T&T which is being hosted by PJ of Seduce Your Tastebuds...., brainchild of Zlamushka and taken over by Lakshmi.

Only change I made was adding few extra green chillies cos we like it spicy!!

Recipe Source

Changes I made cos we like it spicy -

used extra 3 green chillies
didnot extract tamarind pulp, but used tamarind directly and dropped it in to be ground along with rest of the grindable (is that a word) ingredients.


Ingredients:
Few drops of oil
1/2 cup coriander leaves
1 big onion, roughly chopped
3 tbsp Urad daal
1 tbsp chana daal
3 dry red chillies
3 green chillies
a small gooseberry size tamarind
2 tbsp grated dry coconut

For Tempering:

1/2 tsp mustard seeds + urad daal
few curry leaves
1 tbsp oil
salt to taste

Method:

In a few drops of oil, fry urad daal, channa daal, dry red chillies and green chillies. When they splutter, add the onions and coriander. Cook till the onions are translucent and coriander has withered. Add coconut in the end before removing from the flame.
Cool it and grind to chutney consistency.
Temper it with mustard seeds,curry leaves and urad daal in a tbsp of oil.
Add salt to taste to the chutney along with tempering and mix well.
Serve and Enjoy!!!

Verdict:
It was a yummy chutney, but on the sweeter side.
The onion makes the chutney a little sweet, so next time I make it, I am going to add more green chillies and dry red chillies.
But nonetheless, it was super delish. Would surely be yummy along with idli and dosas!
We had it with hot rice!

Tuesday, November 23, 2010

Nune vankai / Stuffed baby eggplants


Nune Vankai / vankaya is a very popular Andhra dish. It also goes by the name 'Bagara Baingan' in gravy style, a nice side dish to accompany pulaos, fried rice or biryanis.
This is also one of the recipes which doesn't stick to one particular style all the time. It varies on the different spices used.
It also can be made with peanuts and cashew nuts to get the more shahi flavor.
I have blogged a stuffed eggplant recipe with peanut stuffing before, and so I wanted a different recipe this time around!

I like my brinjal curry to be of a more drier variety so I didn't leave much gravy. But you surely can add gravy to this dish, by adding more chopped onions, tomatoes and yogurt to the pan before adding the stuffed eggplant. This way the eggplant will get cooked in the gravy it self. I will post a picture of this when I make it! :))
Adding peanuts surely gives it a unique taste, but adding all the roasted daals also imparts and delicious flavor.

First all the below ingredients need to be dry roasted and ground with the sauted onions and tomatoes to make the stuffing. This is then stuffed into the cut eggplant and cooked on a low flame to get even cooking on the baby brinjals.
If you think you made more stuffing than you need, you can always store it in the freezer for the next use.


Ingredients:

15-20 baby eggplants / brinjals / vankai / vankaya, washed and cut in a + shape from the other side, not cutting all the way thru.

For dry roasting:

1/4 cup channa daal, urad daal
1/4 tsp black pepper,
1/2 tsp methi seeds
2 tsp daniya seeds
1 tsp jeera
1 tsp poppy seeds
6-8 red chillies
5-8 cloves
2 inch pieces cinamon stick
1/2 cup coconut (add towards the end)


Sauteed in 1 tsp oil and to be ground along with spices:
 
1 large onion
1 large tomato
4 green chillies
bunch of curry leaves
2 tbsp ginger garlic paste
1 tsp chilli powder
1/4 tsp turmeric
1 lemon size ball of tamarind
salt to taste

1 tbsp of oil
some water if required
chopped coriander leaves for garnish

Method:

Dry roast all the whole spices and keep aside to cool.

In about 1 tsp of oil, saute the onion and tomato till they are cooked. Add the ginger-garlic paste, green chillies, curry leaves, chilli powder, turmeric and tamarind and saute for couple minutes more. Add salt. Remove from heat and let cool.

When cool, grind all the spices and the onion-tomato mixture, with little or no water, to a thick paste. Check for salt now, and add more if required.

Stuff this into the cut baby eggplants.

Heat about a tbsp of oil in a pan and add these stuffed brinjals. Cover and cook on medium to low heat turning from time to time. Sprinkle a few drops of water if required.

(If making gravy style, Before adding the eggplants, add some more chopped onions and tomatoes, let them cook and add beaten yogurt. When this slightly thickens, add the stuffed eggplants, and let them cook in the gravy)

Serve hot with biryanis, fried rice, pulao or just rice. It also goes good with naan, roti or chapathi. Enjoy!!!

Monday, November 22, 2010

Kasuri Methi Aloo for T&T


Another beautiful blog is on T&T this week, well all blogs are beautiful and have good recipes, but from this blog you are sure to get some easy to make recipes and they will be yummy too. So this month is Priya's Blog Priya's Easy N Tasty Recipes is up for T&T which is being hosted by PJ of Seduce Your Tastebuds...., brainchild of Zlamushka and taken over by Lakshmi of Kitchen Chronicles.

I made this last week, when I was not at all in a mood to cook anything elaborate...I needed something which would be done in very less time. I went over few of her recipes and I choose this aloo dish which she has posted a long while ago.

The good thing is that I had kasuri methi in my pantry and aloo too. I love Methi Aloo and this recipe is a twist of it.
A good substitution would be adding fresh methi leaves, but why to do that when adding kasuri methi would also impart good flavor! and the dish would be cooked in very less time.
I baked my potatoes in the microwave instead of the stove top. The rest I followed exactly. Easy Peasy dish...go ahead and try it! It also makes for a easy potluck dish!

Recipe Source

Changes I made to the recipe:
3 large potatoes instead of 5,
potatoes baked in microwave,
used pinch of turmeric, cos I can't live without it! :))

Ingredients:
3 large potatoes (baked in Microwave)
1 onion, chopped
2 garlic cloves, crushed
1 tsp red chilli powder
pinch of turmeric powder
1 tsp coriander or dhaniya powder
3 tbsp kasuri methi or dried methi leaves
1/2 tsp cumin or jeera seeds
salt to taste
1 tbsp oil

Method:

Bake potatoes in the microwave till cooked. Remove, let cool and peel. Chop into cubes.
In a kadhai, heat oil. Add crushed garlic and cumin seeds. Let them brown and splutter.
Add the onion and fry till translucent.
Add the cubed Potatoes and saute. Add the salt, chilli powder, turmeric and dhaniya powder. Mix well. Saute for about 5-7 minutes.
Add the Kasuri methi and saute for another couple of minutes and remove from heat.
Serve with Chapathi, roti or just with hot rice. Enjoy!!!

Verdict:
It was simple and easy dish to make and even tasted super yummy! I think I munched on the aloo a lot even before our dinner!
We had it along with coriander onion chutney from her blog and pappu Kattu.

Friday, November 19, 2010

Mixture


After a week long of posting one crunchy and other crunchy, I at last came to the end for which I have been making all these crunchies...that's 'Mixture'.
One of probably most loved snack in our country! Tho there are many more loved snacks, this is the one which we would go to the sweet shop and not come out without getting a bag of yummy crunchy deliciousness!

Every sweet shop and every Mixture maker probably has their own version of what to use in a mixture and probably it changes from time to time. Its the same with me. I don't make it the same everytime either.

Under the category 'Mixture', you can also add Chivda, Cornflakes mixture, Sabudana mixture, and many many more.
Some are very easy to make and some like this one are time consuming. It took me 3 hours from start to finish cos I made Ribbon Murrukku, Boondi and Sev also the same day. Also frying the daals, sabudana, cashew nuts, peanuts take some time.
I have always made it this way, so I am used to it.

I won't tell you what you should add to the mixture, its always your choice as to what should go in it. It should be of you liking as you are going to make it and enjoy it later on!
I won't even tell you how much of each should go in there, that too depends totally on you. I am only going to what I used, and please feel free to omit few or add on a few more.
In the end, I have given some tips on to how you can make this easier, so here goes the ingredients for my MIXTURE.

Ribbon Murukku Recipe

Sev Recipe

Boondi Recipe

Prep before:

- If using whole daal, soak a night before or atleast 4-6 hours in water. Just about an hour before, remove and air dry on a paper napkin.
- If using split channa daal and moong daal, soak 1-2 hours before. Air dry for atleast 1/2 hour.


Here is what all I used:

Ribbon Murrukku
Boondi
Thin Sev
Peanuts
Cashew Nuts
Golden raisins
Whole Moong Daal
Whole Lentils or Masoor daal
Fried Gram or Putnal pappu
Nylon Sabudana
Murmaralu or puffed rice

Chilli powder
Salt to taste

For Tempering:

crushed garlic
Dry red chillies
bunch of curry leaves

Oil for deep frying

Can also be added:

Thick poha
Corn flakes
Channa Daal
split moong daal

Method:

Make Ribbon Murukku, Sev and Boondi. Keep aside. Break Ribbon Murruku into small pieces about an inch long. Crush the Sev to small pieces.

Fry Nylon Sabudana in Oil (be careful as these pop sometimes). Remove on a paper napkin.

Shallow Fry the soaked and air dried Whole moong daal and whole lentils one after another, NOT TOGETHER. Each daal takes a different time, so frying them together may not be a good idea, as one might get cooked and other may not. And also they do take a long time to become crunchy. For me it took me whole 10 mins to fry one batch. I kept checking from time to time if they were crunchy or not.

- - If using split channa daal and moong daal, fry the soaked and air dried daal one after other.

- - If going to add Poha or cornflakes, fry in oil and remove onto paper napkin.

In an other pan, add only few drops of oil and roast the puffed rice till slightly brown. Remove and keep aside.

Add few more drops of oil, roast the fried gram till slightly brown. Remove and keep aside.

In a few drops of oil, fry peanuts till they are lightly brown, add cashew nuts and fry till brown, add the raisins and fry them. Remove all onto a paper napkin

Add some salt and chilli powder on each dish before mixing them together. You can always add them when each dish is hot. You can also add few curry leaves at a time.

Now for tempering. This step is optional, but garlic surely gives a nice smell and taste to the mixture.
In a few drops of oil, add the crushed garlic and fry till brown. Add few dry red chillies and curry leaves and saute for couple of minutes before adding to the mixture.
Mix everything together carefully.
Serve as a tea time snack, or eat whenever you feel like it!
Enjoy!!!


Tips on how you can make it in a easier way:

You can use store bought boondi, sev, murrukkus, Fried moong daal etc.,.
You can substitute one or more ingredients with the store bought stuff and it will be easier and less time consuming.
If you feel any of the store bought stuff is not fresh enough, Shallow roast them in little oil. This will make them crunchy and taste fresh again.
To add your touch to it, don't forget to temper it with garlic and adjust the spiciness by adding chilli powder to it!

Thursday, November 18, 2010

Sev - Version 2


I have blogged Karampoosa / Thin Sev before. So this is a 2nd version of Sev.
Mixture cannot be complete without sev. It gives the body for mixture.
There are so many versions of making this too....Like I said before, however you make it, it has to be crunchy in the end.

The reason I used equal amounts of besan and rice flour is because, I get too bored with the taste of besan when eating mixture. This way, the besan taste doesn't get stuck in your mouth. And in mixture, there are so many tastes and textures going on...I just like it this way.

Its very easy to make, just be cautious while using hot oil to knead and also when pressing the sev into oil, cos the oil tends to rise up immediately. Don't put too much oil in the kadhai and don't press too much sev into the oil.

My kids love to eat sev or karampoosa just as a snack too. So whenever I make this, I tend to make more and leave some to the side and mix rest into the mixture, that is if I am making mixture too.


Sev - version 1

Ingredients:


2 cup besan
2 cup rice flour
salt to taste
3-4 tbsp hot oil
2 tsp chilli powder
1 tsp hing
warm water to knead

Oil for Deep frying

Method:

Mix all ingredients together. Add in the hot oil and knead it with warm water.
Using the thin holes achu of the muruku press, Press out sev in hot oil. Be careful as the oil will rise.
Turn over and fry to golden brown on both sides. Remove onto a paper napkin.
Serve after it gets cool, as a snack or mix it up in mixture.
Enjoy!!!

Wednesday, November 17, 2010

Ribbon Murrukku


Ribbon murrukku is an easy one to make. Mix all the ingredients together and use the kind of rectangle shaped slot disc in the murrukku press to make the murrukkus in the hot oil.
Everyone has a different recipe to make these...the only thing is that the end product should be crunchy! My kids love it and even pick it out of the mixture I made!!

I have even made these using corn flour, not corn starch, corn flour...is light yellow and soft like besan (gram flour). When made with corn flour, the taste is slightly different, but it surely tastes good.
If you are going to use corn flour, use 2 cups corn flour to 1 cup rice flour. The rest will be the same.
But this time I didn't do that way, but used regular rice flour and besan. You can always change the amounts and adjust everything to your tastes. Its fun when it doesn't taste the same all the time!
This time I used vaamu, carom seeds or ajwain, but you can make them without it or use jeera, cumin seeds or Hing, inguva or asfoetida.
The only other equipment required is the murukku press, or muruku achu.


Ingredients:
2 cups rice flour
1 cup besan
1 tsp vamu
salt to taste
1-2 tsp chilli powder
2 tbsp hot oil
warm water to knead

Oil for deep frying

Method:

Mix all the ingredients together with hot oil. Knead in the warm water to make a soft dough.
Since you are using rice flour, it tends to soak up the water and become hard, so if you think its getting hard and is hard to press it out add some water and knead again little by little.
When oil is hot, fill the murukku achu with the dough and press it out into the oil, going round and round couple of times.
When it turn golden brown, remove onto a paper napkin.
Serve as a snack or eat whenever you like to. You can also use it as an ingredient for your mixture :))
Enjoy!!!

Tuesday, November 16, 2010

Boondi / Crunchy petite balls made of gram flour


Boondi is an all time favorite with kids and adults alike. They are small, more like petite balls made out of besan aka. gram flour mainly bengal gram.
Besan is a main ingredient of many Indian sweets and savories. Not that all sweets and savories are made of besan, but many do carry this as the main ingredient. So not all Indians are unaware of this :))

And Boondi, yumms!....can be eaten just like that, or can be added to yogurt for 'Boondi raita', or added for a crunch on 'Dahi vada or dahi bhalla', can also be added into 'Mixture' (that's what I did), Or even this -- eat with rice!!!...In some south Indian weddings, they serve boondi or even mixture sometimes as a side dish, that's where I first tried it with rice or pulihora or even with daal rice and....mark my words-- Boondi gives a very good crunch and taste when eaten along with rice!!! And so from then, whenever I have Boondi or Mixture at home, I do eat it with daal rice, yogurt rice....Yummm!!
Ok to get back to the recipe...
Many people have different compositions as to how much of besan and rice flour should be used. But how ever it may be, all it has to be that the Boondi has to be crunchy!! So I used half and half of both and they do come out crunchy!

Only other requirement is the boondi ladle, which is like the regular holed spoon, but different because, it has high sides, and the holes have sharp or pinched botton edges so that the batter falls down easy. You can always try with the regular holed ladle.
Another thing is that the batter should be thick. If the batter is thin, you might not get perfect ball shaped. I never say that I can get perfect shape, I sometimes even do get tails on my boondi...but they are somewhats ball shaped...
So once you try for couple of times...You will get the hang of it.
Use a regular ladle to make the batter fall through the boondi ladle.


Ingredients:

1 cup besan
1 cup rice flour
salt to taste
1 tsp chilli powder
pinch of baking soda
warm water to make into batter

Oil for deep frying
bunch of curry leaves (optional)

Method:

Mix the ingredients together with some warm water into a thick batter.
When oil is hot enough, Use the regular ladle to spoon some batter onto the boondi ladle.
Use the regular laddle to make circular motions on the Boondi ladle so that the batter drops as balls into the oil.
The batter when in oil, will puff up into balls. Fry till golden and crunchy.
Remove onto paper napkin. Add some curry leaves to it, when the Boondi is hot.
Sprinkle some salt and chilli powder on the boondi. Mix well.
Serve as a snack, or in Boondi raita,or top on Dahi vada, or mix it up in Mixture.
Enjoy!!!

Monday, November 15, 2010

VARO - Indian Praline / Brittle / Chikki with Mixed Dry Fruits / Diwali Sweets for ICC


Varo, I realized is a kind of a brittle / Chikki which we have enjoyed a lot when we were kids. Peanut chikki, cashew nut brittle to name a few. It can also be made into ladoos.
Mixed dry fruits was going to be something new. This is also a dish which is enjoyed for Diwali as a festival dish.
Even just nuvvulu or sesame seed brittle, chikki or ladoos are made. Its even yummy with just puffed rice or murmuralu.

I am glad I got to try to make this dish for ICC for November, hosted by Srivalli. Only thing I didn't  know was that it was going to be so easy to make it!
It also came out so beautiful that I couldn't help but take so many pictures.

The brittle/ Praline which I have enjoyed as a kid was made with a mix to jaggery and sugar or only jaggery. This is the way the make in sweet shops in Andhra. When Jaggery is used the brittle is more brittle or on the soft crunchy side.
This varo is made entirely using sugar, so it made it extra crispy and crunchy. The addition of poppy seeds gave it a nice texture and taste.
I took it to out Diwali Potluck Party and everyone enjoyed it!

This recipe we got for ICC was from Simply Sindhi Recipes. I followed the exact same measurements and the recipe.

Only change I made is using grated coconut / coconut flakes instead of sliced coconut, because I didn't have any sliced coconut at home!
I used parchment paper to put the nut mixture in between and rolled it out with a rolling pin. You can do this or use a flat bottomed cup to flatten it out.


Ingredients:

Mixed Nuts:

1/3 cup Almonds, I used slivered almonds
1/3 cup Pistachios, chopped
1/3 cup Cashews, I used broken halves

2 tbsp coconut flakes or grated coconut
2 tbsp white poppy seeds

1 cup sugar
1 tsp cardamom powder
1 tbsp ghee, clarified butter

Method:

Keep all ingredients ready. If using a parchment paper and rolling pin, keep it ready too, otherwise a flat surface and flat bottomed cup. Once the nut mixture is ready, you will have very less time to transfer and flatten it out.

Melt sugar (without any water) in a heavy bottomed pan, with ghee and cardamom powder, on low heat. Once it melts, keep stirring and it will soon change color and caramelize.

Add the rest of the ingredients and mix well to coat all the nuts. Remember to do this very fast, since the mixture will start to harden. Do this on low heat, so that it will be easy to mix.

Once all nuts and properly coated, immediately put it in between the parchment paper and roll it out with the rolling pin to desired thickness. It will immediately harden, so be quick!

Cut into squares or diamonds shapes using a knife. Let cool and serve! Enjoy!!!


Tuesday, November 9, 2010

MEC - FESTIVE DISHES for October round up!


I thank all you guys for participating in MEC-FESTIVE DISHES and I Thank you Srivalli of Cooking 4 all Seasons for giving me the opportunity to host this event.
I enjoyed it truly and I hope everyone has too by making these yummy dishes and finding a very good use of your 'MICROWAVE'.
I am so happy with the response I got with this event that I am ready to host another event!!!....:))...how nervous I was before I actually did...But I thank you all for supporting me!

To tell you seriously, before I ever came across this event, I only used my microwave for heating and re-heating purposes only.
This event has broadened my knowledge and also my microwave usage!!
Here is the round for you guys....sorry for being late...what to do...Diwali was in the way...:))...no no not giving excuses...but seriously...preparing for Diwali!!
Hope you all also had a fun Diwali and now have fun reading these recipes!...Enjoy!!!


VEGETARIAN


Entries from Suma Gandlur @ Veggie Platter

BANANA PAYASAM / KHEER


APPLE BANANA CARROT (ABC) HALWA


Entries from Priya @ Priya's Easy N Tasty Recipes

MW MANGO AND COCONUT LADOOS


MW MANGO AND COCONUT PEDAS


MW COCONUT AND PINEAPPLE LADOOS


Entries from Kanthi @ Rasoi ki Malkin

STARFRUIT JAM


CARROT HALWA


PALU PAYASAM/MILK KHEER


PESARAPAPPU SWEET


Entry from Lata Raja @ Flavours and Tastes

COCONUT LADDOO


Entry from PJ @ Seduce Your Tastebuds....

MICROWAVE WHEAT LADOO / CHURMA LADOO


Entry from Nivedita @ Nivedita's Kitchen

QUICK VERMICELLI KHEER


Entry from G. Pavani @ Food Lovers

WHEAT LADDOS


Entry from Brinda @ Family Recipe Guide

ALMOND ROCK (NUT ROCK)


Entry from K @ Khichdi

SOOJI KA HALWA


Entry from Sree Valli @ Ammaji's Recipes

VERMICELLI PAYASAM


Entry from Srivalli @ Cooking for 4 Seasons

MICROWAVE CHOCOLATE BURFI IN 5 MIN.


Entries from Satyasree @ Super Yummy Recipes

RICH BADAM HALWA


PISTA SHAHI RABRI


Entries from Myself....

ROOHAFZA FALOODA


COCONUT - SOOJI BURFI (MICROWAVE RECIPE)


NON-VEGETARIAN

Entry from Srivalli @ Cooking 4 all Seasons

MICROWAVE CHICKEN BIRYANI (LOW CAL)


And finally, how to make perfect healthy papad in the microwave from my sweet sister, Sudha...thanx for sending this dear! :))

Recipe - Healthy Papad and Papad chat


1. Place paper towel in microwave.

2. Sprinkle water on both sides of papad (I used madrasi papad and chilli papad) and place in microwave.

3. Set microwave for 15 seconds.

4. Once done leave the papad outside for 1 minute while it becomes crispy.

5. Serve this non-fat healthy papad with dal or sambar.

6. Top it with chopped onions, green chillies, tomatoes, coriander leaves and a drop of lemon juice for a "Healthy and Quick Papad Chat"


I truly enjoyed and love all the recipes I have recieved from all you guys...Thank you Once again...If I missed out on any, Let me know and I will add them in...

November Edition of MEC - For Sweet Tooth is being hosted by Priya of Priya's Feast. Please send your yummy recipes to her!
Have fun and ENJOY!!!