This is default featured slide 4 title

Go to Blogger edit html and find these sentences.Now replace these sentences with your own descriptions.

This is default featured slide 5 title

Go to Blogger edit html and find these sentences.Now replace these sentences with your own descriptions.

Showing posts with label Rice. Show all posts

Monday, March 25, 2013

Quinoa and Rice in a quick Chinese fried rice / Quinoa with lots of Veggies


Again the days have come and gone, more like months have come and gone...and the year is quickly passing by. Though we are still not totally out of the clutches of winter in some parts, in other parts spring has already been showing its beauty. I continue to clicks lots of pictures of flowers as I so fascinated by all the different types of flowers nature has in store! I hope everyone out there is getting to enjoy a bit of the new spring and taking full advantage of it by planting new plants. I haven't started to plant here as yet but I sure to plan on getting on that job soon. Other than that life has been normal as always. Kids and their activities takes up most of the time and I find so less time to myself. The very less time I get, I just feel like relaxing...that's the reason I started spending so less time on the blog. I keep telling myself that I should do more...but...that just keeps hanging. :)
Well no worries, that's how life is I guess and I should just keep going on with it!

The reason I make this dish very so often is to finish any leftover rice. But then there are times when I make it to have as a side dish. Though noodles are kids favorite, I think my favorite has always been the fried rice. While trying to make it healthier whenever I feel like eating it, I started making it with quinoa. But then there come days when there is some left over rice and some left over quinoa. That's when I decide to combine both of them to make  this fried rice. 
Since rice and quinoa blend together very nicely, you cannot really tell which is which. :) That helps with kids!
This dish can be made completely with quinoa or completely with rice. I just like to add lots of vegetables and egg to make it more nutritious. You can add some cooked chicken or shrimp to make it more exotic too :).  Or omit the egg to make a wholesome vegetarian dish. Add some lima beans and sprouts to make even more delicious. Well these are just a few ways in which you can adapt this dish. Its more like a pantry dish where you can put what ever is there in your pantry to make it your type of dish.


Ingredients:

1 cup quinoa (cooked and cooled)
1/2 cup rice (leftover rice or cooked and cooled)

3 garlic cloves, chopped small
2 green chilies, chopped small
1/4 cup chopped carrots
1/4 cup peas
1/4 cup chopped beans
1/4 cup chopped bell pepper (you can use a mix of colored pepper if you wish)
1/2 cup of broccoli florets
1/2 onion, chopped
2 eggs, scrambled with pinch of salt and pepper

pinch of red pepper flakes (optional)
1 tbsp oil (can be substituted with sesame oil)
salt to taste
1 tbsp low sodium soy sauce
Chopped scallions for garnish


Method:

Heat the oil in a wok or pan to medium hight heat.
Add the chopped garlic and green chili and sauté for 10 seconds. Add the onions and saute for another 10-20 seconds.
Add the carrots, peas, bell pepper and beans and cook for a minute or two with a sprinkle of salt.
Add the broccoli florets, with a pinch of salt and saute for another 15 seconds.
Add the cooled rice and quinoa, along with the scrambled egg. Saute on high heat to mix well. Add the soy sauce and mix well again.
Garnish with chopped scallions or green onions.
Serve hot. Enjoy!!!


Wednesday, February 29, 2012

Flavorful and Easy Green lentils and rice


There was a time when I didn't know the difference between green lentils and whole masoor dal or red lentils. Since they both looked the same I thought they both are one and the same. Since I didn't use either of the lentils that much, I didn't know the difference in their cooking times either. Now I know the they both are different, other than the looks which is the whole red lentils are kind of smaller than the green lentils and where as the green lentils cook much faster than red lentils, which cook for a way longer time or have to be pressure cooked.

There is a Greek rice dish which is made of these green lentils known as 'Majadra'" which is cooked with lots of caramelized onions and garlic. A very flavorful 'Pilaf' as they call it!
This is a twist on that dish....the twist being making it Indianized with addition of Garam masala and ginger garlic paste. I left out adding green chillies and making it more spicier, but for the adult version, I think you should add few chopped green chillies and add more chilli powder. When I make this for my kids, I can't stop eating it, because I love having whole lentils in rice. It surely gives a whole new texture to the rice.

To make this rice, you will have to be little bit of prepared, as you to boil the lentils for about 10 minutes before making the dish. The lentils should be only cooked so much that they don't loose their wholeness or split open or become mushy. When you check if they are cooked, there should still be a slight bite to it. They will cook completely when you cook them again as a dish.
It makes for a yummy one pot meal, as well as a nutritious lunch box dish for kids or adults.

Ingredients:

1/2 cup green lentils, washed and boiled for 10 min
1 cup cooked rice
1/4 piece onion, cut lengthwise
1/4 piece of tomato, chopped
coriander leaves for garnish

Pinch of shah jeera or kala jeera
pinch of jeera, cumin seeds
1/4 ginger garlic paste
1/4 tsp chilli powder
pinch of turmeric
1/4 tsp garam masala
salt to taste
1 tsp oil

Method:

Wash and boil the lentils, till they are tender but not split open or mushy. Takes about 10 minutes. Drain and keep aside.
Heat oil in a kadai and add the shahi jeera and jeera. Let them splutter.
Now add the drained lentils.
Add the some salt and add the ginger garlic paste. Saute for a minute.
Add the chopped tomato, along with turmeric, chilli powder and garam masala. Cover and cook for 2 minutes, till the tomatoes are soft.
Add the chopped onions and saute for about a minute.
Add the cooked rice and some more salt. Mix well. Cover and cook for another couple of minutes.
Garnish with coriander leaves.
Serve hot or warm.
Enjoy!!!


Check out the Blogging Marathon page for the other Blogging Marathoners doing BM# 13

Tuesday, February 28, 2012

Instant Egg rice (with Dhaniyalu podi or coriander lentil powder)


If I ask my little one what should I make for lunch, he will reply Peas rice....little does he know that egg also goes into it and its more like an Egg rice instead of a Peas rice.
He doesn't mind eating it everyday, only I do get bored of making it everyday! I guess he just likes the taste of what goes into it!
He will say I don't like onions..don't feed me onions, but then he sees that rice and say..thats fine, just feed me the onions, I like the onions in peas rice.
Well here is his version of 'peas rice' and my version of 'Instant Egg rice' :) Both being same!
All you need to have is the Dhaniyalu podi (which we use as idli or dosa podi too) on hand and if you have some leftover rice, its very quick to make.
Comes in handy when you are pressed for time and want something to do done very quick! For adult version, add some chopped green chilies and spike the chili powder! :)


Ingredients:

1 cup cooked rice
1 egg
1/4 cup peas (frozen or fresh)
small piece of onion, chopped

1/4 tsp ginger garlic paste
pinch of turmeric
pinch of chilli powder
1-2 tsp dhaniyalu podi / coriander lentil powder
1 tsp of oil
salt to oil
chopped coriander leaves for garnish

Method:

Heat the oil in a kadai.
Add the egg and scramble it well.
Add the onions and saute for a minute.
Add the ginger garlic paste and saute it well.
Add the peas and some salt and cook for couple of minutes till they are cooked.
Now add the rice along with all the powders (turmeric, chilli powder, and the dhaniyalu podi). Mix everything up well. Add salt to taste.
GArnish with chopped coriander leaves.
Serve hot.
Enjoy!!!

Check out the Blogging Marathon page for the other Blogging Marathoners doing BM# 13

Monday, February 27, 2012

Easy Okra Rice / Lady's finger Rice / Bendi Rice


Bendakaya is the most popular vegetable in my house. Every week we have to have Bendi fry or any dish which has Bendi in it. I use it in rasams, sambars and pulusus too! My kids, along with me love it a lot and so no one had any complaints when I make any dish with okra. I just wish I had a constant supply of okra all the time! :) well my grocer is not too bad in carrying fresh ones most of the time.

So having this is in lunch box it surely a hit. In lunch box I mean as lunch as my kids rarely take rice to school!
I sometimes even add a few pieces of cashew nuts to this rice and it tastes yummy! This is surely for the kids who love bendi and cashews!

This dish is pretty easy to make, all you need is a few bendi on hand along with cooked rice. Bendi doesn't take much time to cook and cutting like about 10 bendi in the morning isn't much of a hassle. You can always cut them the day before and have them ready for you to use.

Ingredients:

10 Okra, cut into small pieces
1 cup cooked rice
1 small piece of onion, chopped

pinch of urad dal
pinch of mustard seeds
pinch of jeera or cumin seeds
1 dry red chili, broken
few curry leaves
salt to taste
pinch of chili powder (optional)(as per taste)
pinch of turmeric
1 tsp of oil
garnish with chopped coriander leaves

Method:

Heat oil in a kadai and add urad dal, mustard seeds and cumin.
After the brown and splutter, add the red chili, curry leaves and onions.
Saute till translucent.
Add the cut bendi and salt, cover and cook for about 5-10 minutes, until the bendi is cooked through.
Add the chili powder, turmeric and saute well.
Add the cooked rice and mix it up well with the cooked bendi.
(If you want to add cashews, add them just before you add onions and them brown a little)
Garnish with chopped coriander leaves.
Serve warm or hot. Pack in a hot box for lunch. I don't mind eating it cold either :).
Enjoy!!!


Check out the Blogging Marathon page for the other Blogging Marathoners doing BM# 13

Sunday, February 26, 2012

Easy Channa or Chick pea rice


Having Canned or frozen channa / Chick peas on hand is quite useful for those rushed mornings.
When using canned chick peas, you don't even have to cook for long. I usually soak channa overnight and then freeze them, so that I have them ready whenever needed. Any kind of chick peas is fine. While you find of white or kabuli channa for the canned ones, we can always get black and the littler ones at the Indian grocery always (along with the big white ones too).
To make a rice using chick peas doesn't take much time at all. I like to to add a little bit of ginger garlic paste along with tomato and some garam masala to make it flavorful and yummy to eat for the kids. I don't use much chili powder of green chilies but to make an adult version, go ahead and increase the amount of chili powder and add some chopped green chilies to spike up the spice intensity.

Ingredients:

1 cup of cooked rice
1/3 cup frozen of canned chick peas or channa
1/4 piece of onion, chopped
1 tomato, chopped

Salt to taste
1/4 tsp ginger garlic paste
1/4 tsp chili powder
pinch of turmeric
1/4 tsp garam masala
1 tsp oil
chopped coriander leaves for garnish

Method:

Heat oil in a kadai. Add onions and saute till translucent.
Then add the ginger garlic paste and saute for 30 sec before adding the tomatoes.
Add the chick peas and some salt. Cover and cook for about 5 minutes till the chick peas are cooked.
Add the turmeric, chili powder and garam masala and saute for another couple of minutes.
Add in the cooked rice and mix it up well the cooked chick peas.
Garnish with chopped coriander leaves.
Serve warm or pack it in a hot box.
Enjoy!!!

Saturday, February 25, 2012

Quick and easy Carrot rice


Here is another simple and easy dish which I am sure your kids will enjoy! My kids do and I love to eat it with them. Its pretty quick and very easy to make when you have cooked rice ready. If you are going to make this the kid's lunch box, you can always grate or shred the carrot the night before and keep it ready. Shredding one carrot doesn't take much time and therefore this rice get ready very quickly!

I don't use ginger garlic paste in this preparation but if you want to use it, don't hesitate. I just keep it simple and easy with just a some tempering.
Remember not to cook the carrot too much or over cook it, as it could get mushy. Even if there is a slight crunch in the carrot, it won't be that noticeable and I am sure the kids will enjoy it.

For an adult version of this similar rice, add some chopped green chilies and step up the spice level by adding  some chili powder to it!

Ingredients:

1 cup cooked rice
1 medium sized carrot, grated or shredded
1 small piece of onion, chopped

pinch of mustard seeds
pinch of cumin / jeera seeds
pinch of urad dal
pinch of turmeric powder
1 red chili, broken
few curry leaves
chopped coriander leaves for garnish
salt to taste
1 tsp of oil


Method:

Heat the oil in a kadai and add the urad dal, mustard and jeera.
After they start spluttering, the red chili and curry leaves.
Add the carrot and saute for a minute. Since its shredded or grated, it doesn't take much time to cook.
Add the cooked rice along with salt and turmeric. Mix it up well.
Garnish with chopped coriander leaves if you wish.
Serve it warm or hot.
Enjoy!!!


Friday, February 24, 2012

Quick Egg and Green onion Rice


Eggs are very common in my house. I use them almost everyday. There might be a day or two when I may not use them but my fridge is always stocked with eggs. Though we don't eat more than 1 per person per day, I think having one per/day is good for your health.
Egg burji and hard boiled egg dishes are a favorite of my old son and my husband. My younger one prefers them little lesser than the older one. For this reason, for him its mostly burji or mixed up in rice type of dishes, where he won't know its presence in a dish.

Here is a dish where the protein 'egg' is mixed with rice and green onion otherwise known as the greens of the scallions. This dish doesn't have any masalas in it. You are welcome to add some and make it how your prefer it. Rice is sauteed with ginger garlic paste, salt and bit of pepper for taste.
This rice is better when eaten warm or hot, so remember to pack it as a hot pack lunch.

Ingredients:

1 cup of cooked rice
1 egg
few chopped green scallion leaves
1/4 onion, chopped

1 tsp of oil
1/4 tsp ginger garlic paste
salt to taste
pepper to taste


Method:

Heat oil in a kadai and add the egg. Scramble it on medium heat till its cooked.
Add the onions and ginger garlic paste. Saute for a minute.
Add the rice along with some salt and pepper. Toss them all together.
Cover and cook for another couple of minutes before adding the green onions.
Serve hot or warm.
Enjoy!!!


Check out the Blogging Marathon page for the other Blogging Marathoners doing BM# 13


Thursday, February 23, 2012

Easy Paneer and Peas rice - BM # 13


HI Guys...I am back again with Blogging Marathon # 13....the only reason why my blog gets some blogs posted by me! The only way I get up and do something for the blog, otherwise my busy life just takes over and I don't find enough time to blog hop or even write up posts!
I always promise myself to write and be regular but that doesn't seem to happen very often! Something or the other has to happen...this time around its the crashing of the laptop! I thought I won't be able to participate this time around, but thankfully my hubby fixed a working station..a combo of a old laptop and an old computer screen, which seems to be working when it has a mood to work!! I just hope it will cooperate with me and not stop for the next 7 days!
So for this Marathon, I decided to go with the Easy Lunch Box Recipes for kids made of rice. We should really Thank Srivalli for having so much patience and thought in bringing all this together with amazing themes every month.

Coming to the theme, my kids don't take rice to school, at least my older one does not and will not take rice to school...how much ever I plead with him. My younger one will, as long as it is something which he likes. I surely wish whatever they take, may the lunch box come back home empty...that will not happen either.

But make the same dish at home, they will complete it without asking any questions. So there is a gain and hope that someday that will happen in school too! So my recipes for this theme are all home tested and are eaten at home for lunch or rarely for dinner.
I prefer making easy lunches either for me or for them and not a routine dal and veggie curry which they have for dinner. This way it gives a variety and allows them to think they are having something different. 
As this is not going to have any other extra protein source, I rather mix it up with rice.

To make any of my instant rice versions, all you need to have in hand are onions, sometimes tomatoes, any protein source, ginger garlic paste, garam masala or any other podis or powders and some veggies if you wish.

Here is the recipe for an easy Paneer and Peas Rice. Here I mix up Paneer with some peas into some freshly prepared rice. Leftover rice also can be used. Adding some ginger garlic paste and garam masala makes the rice flavorful and yummy enough to eat!

Ingredients:

1 cup cooked rice
1/4 cup Paneer pieces cut into small pieces
1/4 cup frozen peas
1/2 piece of onion, cut into small pieces

1/2 tsp ginger garlic paste
pinch of turmeric
Chili powder (optional - I do not use it for kids)
1/2 tsp Garam Masala (more or less)
1 tsp oil
salt to taste
Chopped coriander leaves for garnish

Method:

Heat oil in a kadai and add in the paneer pieces.
When the paneer starts to brown, add the onion and frozen peas, along with some salt.
Once the peas are thawed, add the ginger garlic paste and saute for a minute or two.
Add the rice, turmeric, garam masala and some more salt. Mix to combine well. 
Garnish with chopped cilantro leaves.
Enjoy!!!

If packing for school, make sure you pack it in a hot box, so that it will stay warm till lunch time.

To make an adult version - add more veggies and some chili powder.

Tuesday, March 22, 2011

Mexican rice with black beans


When ever we go to a mexican restuarant, I will choose a dish which surely will have the mexcian rice on the side. It is so good with simple flavors and makes for a perfect side dish. Not that I don't like the cilantro rice from Chipotle. I am in love with that rice too and make a quick recreation of that when ever needed with leftover rice. I have even tried it with brown rice and I thought brown rice tastes much better with little lemon and cilantro.

Coming to the mexican rice, its usually is the side dish to many entrees in a mexican restuarant! Its a simple tomato rice with garlic and little cumin powder, gives it just enough flavor not over powering the other items in your plate.

So here is the recipe for mexican red rice. I added black beans, just so that the rice would be just as good when eaten alone!...tho I would eat it anyways plain or with black beans. Its just a perfect side dish when you make quesadillas or anything mexican. It is so easy to make and I am sure you guys will love it too!


For rice:

1 cup uncooked basmati rice or long grain (I used basmati)
1/2 cup black beans (optional)
2 green chillies
2 cloves of garlic, sliced
1 small onion chopped
1/2 cup tomato sauce
1/2 tsp ground cumin
1 - 1 1/2 cup water (depending on your rice, I used 1 1/2 cups)
salt to taste
lemon juice to taste
coriander leaves for garnish
1 tbsp oil

Method:

Heat oil.
Add the garlic, do not brown.
Add in the rice and fry for about 2-3 minutes till toasty.
Add salt and cumin powder.
Add the onions, black beans and green chillies.
Add the tomato puree and water. Mix well and check for salt, add more if required.
Let water come to boil till absorbed. Cover and cook till completely cooked.
Fluff the rice. Add the lemon juice and chopped coriander leaves.
Serve as a side dish to any mexican dishes or eat it plain! :)
I served it with chicken enchiladas. Enjoy!!!

Tuesday, February 15, 2011

Poha ~ Simple and easy, My Mom's way..

I hope everyone has voted for their favorite dish in the event..If not go ahead and do it now!!


For the 7th and the last day of the Blogging marathon I chose another version of rice called atukulu or beaten flat rice.
I have always liked Poha right from when I can remember it. I always liked the way my Mom made it.
Poha is made from what we call in Telugu 'Atukulu' or in English 'Beaten Flat Rice flakes'
For making Poha the correct variety of the flat rice is required. You need the thick flat rice. The thin flat rice breaks up into pieces when you prepare it this way. So you will always require the thick one.
When you have the required ingredients, this dish is very easy to make. Its a fun snack, but I love to eat to for lunch, dinner or breakfast too.
My Mom adds peanuts to this dish which makes this dish more so yummy!

Ingredients:

2 cups poha, beaten flat rice, atukulu
1/4 cup peanuts, dry roasted and coarsely ground

1 small onion, chopped
3 green chillies, chopped

1/4 tsp urad daal
1/4 tsp mustard seeds
1/4 tsp jeera or cumin seeds
few curry leaves
2 dry red chillies, broken
1 tbsp of oil
pinch of turmeric
salt to taste

chopped coriander leaves for garnish
lemon juice to taste (optional)

Method:

Wash the rice flakes in water couple of times. Drain all the water, lightly squeeze the flakes to take to excess water. Keep aside for 20 min.
Dry roast peanuts till lightly brown. Grind them to make a coarse powder.
Heat oil in kadai.
Add the urad daal, mustard seeds and jeera, Let them splutter.
Add the dry red chillis and the curry leaves.
Add the onions and green chillies. Saute for couple of minutes. Add the turmeric powder.
Add the soaked poha along with salt and mix well.
Add the ground peanuts. Mix well.
Add the chopped coriander leaves.
Add lemon juice if you wish.
Serve hot!
Enjoy!!!


See what my fellow bloggers who are participating in the marathon have cooked up today, for the final day of the marathon.

Srivalli, Azeema, Bhagi, Champa, Gayathri Anand, Gayathri Kumar, Harini, Jay, Kamalika, Meena, Mina, Padma, Pavani, PJ, Priya Mahadevan, Priya Suresh, Priya Vasu, Rujuta, Santosh, Saraswathi, Savitha, Shanavi, Sowmya, Suma, Usha, Veena


Monday, February 14, 2011

Borugulu, spicy Murmuralu, Puffed rice snack

Hope everyone is taking part in the voting....Go ahead and choose your favorite dish!...


For the 6th day of the marathon, I wanted to prepare something other than regular rice...so I chose 'Puffed rice snack'!

Borugulu is probably one of the very common street side snack you can find in Andhra...I don't know about rest of the country.
I remember when we were young, a guy would bring a big bag of puffed rice on his bring selling street to street. Whoever wanted to buy would buy by the kilo or whatever required.
Then I remember sitting along Tank Bund is Hyderbad and gobbling up quickly before anyone would want a share from mine.
Another place I loved getting this spicy quick snack was while walking up the Tirupathi steps. Along the way you will find vendor selling this and around the time we always went, it used to be mango time and he would put tons of raw mango...and it used to taste yum!!..
I prepare this sometimes at home as a quick snack and me and my hubby enjoy it more than the kids. That maybe because they haven't tasted it at the right place.


Ingredients:

2 cup puffed rice, murmuralu, dry roasted to crispiness
1 -2 tbsp putnalu pappu, chutney daal, dry roasted
1/4 cup peanuts, dry roasted
1-2 tbsp grated carrot
1-2 chopped onion
1 tbsp chopped tomato
1 green chilli chopped finely
few coriander leaves, chopped
1-2 tbsp mango, chopped
salt to taste
chilli powder to taste
lemon juice to taste

Method:

Dry the ingredients which have to be done.
Mix all the ingredients together.
Serve as is.
Enjoy!!!


See what the rest of the bloggers who are participating in the marathon cooking up!
Srivalli, Azeema, Bhagi, Champa, Gayathri Anand, Gayathri Kumar, Harini, Jay, Kamalika, Meena, Mina, Padma, Pavani, PJ, Priya Mahadevan, Priya Suresh, Priya Vasu, Rujuta, Santosh, Saraswathi, Savitha, Shanavi, Sowmya, Suma, Usha, Veena


Sunday, February 13, 2011

Vangi bath ~ Brinjal, Eggplant, Vankai, Vankaya rice with peanut powder

VOTING started for the event "BEST FOOD I HAVE EATEN OR BLOGGED ABOUT" here on my blog. ALL my friends and readers, please go over and vote for the best foods you like.


Please click HERE to be taken to the page where you can see all the entries and vote for them. REMEMBER to invite all your friends (by announcing on your blog or by personally letting them know :))) to come over and vote for you (and the others).
You can also make it easy by adding the link of the blog post in your upcoming blog post.
Voting ends 22th FEB. Winner gets cookbook by Raghavan Iyer. SO BE SURE TO COME AND VOTE.
EVERYONE GETS ONE CHANCE TO VOTE, SO PLEASE BE SURE TO TELL ALL YOUR FRIENDS.
CLICK ON THE SMALL DOT NEXT TO THE NAME, SCROLL DOWN TO THE BOTTOM AND CLICK THE 'VOTE' BUTTON FOR YOUR VOTE TO GO THRU, OTHERWISE IT WILL NOT!!
Click on the name to be taken to the blogger's blog to read or get linked with the recipes.
Click here to read up on my blog about VOTING.


For the 5th day of our blogging marathon, I choose 'Vangi Bath'
I guess people in different parts of South India, prepare Vangi Bath in different ways and styles. I usually prepare it with vangi bath powder mixed with tamarind juice or pulp. This which I am posting today is a different variety of Vangu bath,
A friend of mine prepares it somewhat this way and I like it.
I decided to venture out on my own and tried it in different ways and I ended up with this.
Like I said before, I like the combination of peanuts with eggplants and thats why I loved it a lot too...Only difference is that I used green eggplants instead of the regular brinjals.
Surely you can make this variety of rice with the regular small or even the big eggplant.
But if you like small green eggplant, then try it with them and it surely tastes good!

Ingredients:

To be dry roasted and ground to powder:

5 tbsp peanuts

1 tbsp channa daal
1 tsp sesame seeds
2 dry red chillies
2 heaped tbsp coconut powder
1 tbsp coriander seeds
4 cloves
2 1in pieces cinamon stick
4 elaichi pods
5-6 curry leaves


5 green egg plants, chopped into cubes
2 cups rice, washed, soaked and cooked
1 small onion, preferably red, chopped
3 green chillies, slit
bunch of curry leaves
1 tbsp ginger garlic paste
1 tbsp jeera, cumin seeds
all of the ground peanut masala powder
2 tbsp cashew nuts
chopped coriander leaves
salt to taste
1-2 tbsp of oil

Method:

Heat oil in a pan or kadai.
Brown the cashew nuts and keep aside.
Add the jeera and let it splutter. Add the curry leaves.
Add the onions and green chillies, saute till they brown.
Add the ginger garlic paste and saute.
Add the chopped eggplants. Add salt, cover and let cook till soft.
Add the ground peanut powder. Saute for couple of minutes. Add cashew nuts.
Add the cooked rice, some more salt if required and Mix well.
Garnish with chopped coriander leaves.
Serve warm.
Enjoy!!!


Find out what's cooking in my fellow blogger marathoner's kitchen...

Srivalli, Azeema, Bhagi, Champa, Gayathri Anand, Gayathri Kumar, Harini, Jay, Kamalika, Meena, Mina, Padma, Pavani, PJ, Priya Mahadevan, Priya Suresh, Priya Vasu, Rujuta, Santosh, Saraswathi, Savitha, Shanavi, Sowmya, Suma, Usha, Veena


Saturday, February 12, 2011

Brown Rice khichdi


For the forth day of the Blogging Marathon, I decided on 'Brown Rice Kichdi'.
Its a very easy and simple dish made with brown rice and moong daal. Its again tempered with some spices.
I make it this way when ever I am bored with plain brown rice. Its made just as I make it with white rice.
I don't add any veggies, cos I like it this way. But you are most welcome to add veggies to make it more interesting.
I like it to this with any curry or even with just pickle. It tastes just as yummy!

Ingredients:

1 cup cooked brown rice
1/2 cup pesar pappu, split moong daal

1 small onion
2 green chillies
1/2 tbsp oil
1/4 tsp mustard seeds
1/4 tsp jeera
few black peppercorns
pinch of hing, inguva, asfoetida
1 tsp ginger grated
few curry leaves

Method:

Dry roast the moong daal. Wash it and cook it with some water and salt.
When the daal gets cooked, add the cooked brown rice, onions and green chillies.
Heat oil and do the tempering.
Add musturd and jeera, let them splutter.
Add the peppercorns.
Add the hing and ginger along with curry leaves.
Add this to the rice with moong daal. Mix well and add salt to taste.
Serve warm with any curry or with avakaya or mango pickle.
Enjoy!!!


See what my fellow bloggers are cooking up on the 4th day:

Srivalli, Azeema, Bhagi, Champa, Gayathri Anand, Gayathri Kumar, Harini, Jay, Kamalika, Meena, Mina, Padma, Pavani, PJ, Priya Mahadevan, Priya Suresh, Priya Vasu, Rujuta, Santosh, Saraswathi, Savitha, Shanavi, Sowmya, Suma, Usha, Veena


Sending this to Siri's WWC event, started by Sanjeetha of Lite Bite


Friday, February 11, 2011

Simple and easy ~ Karam Annam with Masala Karam Podi ~ Comfort and Healing Food :)

I am so sorry guys, but I couldn't start the voting page poll today for the event, as I wished to!!
I am so happy that I got a good number of entries, and everyone helped in making the event successful.
There were a few last minute entries and a few technical difficulties, due to which I am having to create the whole poll again, and which is taking some time, and as I won't be able to get to it till late tonight to do it!.
I will be working on it tonight and hopefully and successfully by tomorrow it will be up and ready for everyone to vote!
Sorry again....but please keep a look out on this space...as I will be posting again tomorrow about the VOTING process and the link!!


Today is the third day of the blogging marathon, and I thought nothing could be better than 'Karam Annam'
This is what I call Comfort and Healing food. Whenever I feel sick or am tired of eating anything else, I will go straight ahead and make this. The mix in the chilli powder and has so many good stuff that when you eat it if you have a cold or when your tongue feels bland, you are sure to love it!
Its spicy, its garlicky and its overall yummy!
My Mom makes this even for breakfast in the morning with leftover rice. It feels really nice to have it in the mornings, especially cold winter mornings, when you feel like having something warm and spicy.
The whole healing properties comes from 'Masala Karam' also known as "Goddu Karam' in many parts of Andhra. Many people use only this karam or chilli powder instead of the regular plain chilli powder in curries or regular everyday cooking.
If my Mom is here she would use this only. As for me, I use regular chilli powder regularly and use this in special dishes. It also tastes awesome when added besan or chanaga pindi while making bajjis or pakodas.
So here is the recipe for my Mom's Masala Karam Podi and Karam Podi Annam.
OK I make it spicy, but for the rice add only how much you can handle :))

Ingredients:
Masala Karam Podi:

1 cup chilli powder
3 tbsp daniya seeds
1 tbsp jeera
1 tbsp clove, cinamom
4 cardamon pods
1 tbsp menthulu
1 tbsp black peppercorn

4-6 garlic pods, (crush and mix with end product)
salt
turmeric

Method to make Masala Karam Podi:

Dry roast chilli powder along with salt and turmeric.
Dry roast whole masala separately.
Grind everything together to make podi or powder.
Crush the garlic pods and mix it well with the podi.
Your masala karam podi is ready.


Ingredients: (for Karam Annam)

1 cup cooked rice
1 tbsp masala karam podi
3 cloves garlic, chopped
1 small onion, chopped
1 tsp oil
salt to taste
chopped coriander leaves for garnish

Method:

Heat oil in a kadai.
Saute the garlic cloves till brown.
Add the onions and saute.
Add the cooked rice and mix well.
Add the masala karam podi and mix well.
Add salt.
Garnish with coriander leaves.
Serve hot or warm.
Enjoy!!!


See what my fellow bloggers have cooked up on the 3rd day of our blogging marathon!

Srivalli, Azeema, Bhagi, Champa, Gayathri Anand, Gayathri Kumar, Harini, Jay, Kamalika, Meena, Mina, Padma, Pavani, PJ, Priya Mahadevan, Priya Suresh, Priya Vasu, Rujuta, Santosh, Saraswathi, Savitha, Shanavi, Sowmya, Suma, Usha, Veena


Thursday, February 10, 2011

Nutty Brown Rice Kheer for crossing 100 Followers on my blog and 2nd day Blogging Marathon

Last Day to send in entries to "Best Food I have Eaten or Blogged about" Event on my blog. Winner gets a cookbook by Raghavan Iyer. For Details check out the ON GOING EVENT in the side bar.
Voting for the BEST one starts tomorrow, 11th FEB and ends on 20th FEB. Don't forget to invite all your friends to vote for you!


I am sooo happy!!!!!!! I have crossed some really memorable milestones during the last few days, one year anniversary, 200 posts and one more ---> crossed 100 Followers....yaayy...
Well don't we all need a reason to celebrate!....and what better reason can I have?!
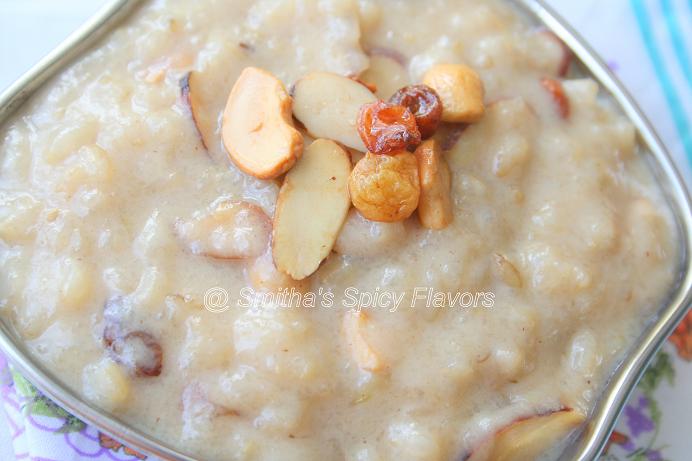
To celebrate this occasion and to keep in theme with the Blogging Marathon, I chose to make a 'Nutty Brown Rice Kheer'.

I was a little worried on how it would taste...but I think I love it. I surely like the nutty texture of brown rice and this really turned out great! So I dare you to try it out and you will really find a yummy treat!
Addition of various nuts increases the nutty flavor. So decide on what nuts and how much you want to use!

I used light brown sugar and condensed milk for sweetness, but you can surely substitute them with sugar and jaggery with increased amount of milk than mentioned below. I used condensed milk to make it easy (and to finish the half can sitting in my fridge), but go ahead and make it more healthy by using splenda or other artificial sweeteners.

Ingredients:

1 cup cooked Brown rice
1/3 cup sweetened condensed milk
2 tbsp brown sugar (can use belam, jaggery, gud instead)
1 tbsp golden raisins
1 tbsp mixed nuts, cashew, almonds, pista
pinch of cardamom powder
little milk, according to need
1 tbsp ghee

Method:

Heat Ghee in a kadai.
Brown the nuts and raisins, keep aside.
Heat condensed milk along with brown sugar and cardamom powder
When it starts to boil, add in the cooked brown rice.
Mix well. If it gets too thick, add milk to loosen it.
Cook for 5 min more, until everything comes together to the required consistency.
Add in the nuts and raisins.
Serve warm or chilled.
Enjoy!!!


Sending this to Wholesome Wholegrain Cooking (WWC) hosted by Siri of Cooking with Siri, started by Sanjeeta of Lite Bite.

Check out what the other Marathon Bloggers are cooking up!

Srivalli, Azeema, Bhagi, Champa, Gayathri Anand, Gayathri Kumar, Harini, Jay, Kamalika, Meena, Mina, Padma, Pavani, PJ, Priya Mahadevan, Priya Suresh, Priya Vasu, Rujuta, Santosh, Saraswathi, Savitha, Shanavi, Sowmya, Suma, Usha, Veena

Wednesday, February 9, 2011

Layered Vegetable Biryani ~ 7 day Blogging Marathon

Only today and tomorrow left to send in your yummy entries to 'Best Food I have Eaten or Blogged about' event on my blog!. Winner gets a cookbook by Raghvan Iyer.
Event open to all US and non-US residents. For details check out the side bar 'ON GOING EVENT'


Here is to the first day of our Blogging Marathon - Layered Vegetable Biryani.
What's Blogging Marathon? you ask....Its an event where lot of bloggers get together and blog continously for 7 days (or more, in this case 7 days) on one particular theme they choose, brainchild of Srivalli of Spice your Life.
I chose 'Rice' as my theme for the next 7 days. So be prepared so see 7 rice varieties over the next 7 days!!

I made this last weekend for a potluck at a friend's place. Lovely company and yummy food kept us awake late into the night!
The biryani did turn out great with all the veggies in yogurt gravy and all also all the whole garam masala.
Only problem I had was, at the time I had to layer my biryani, I couldn't find the right tray to do it in. I usually like to use the big tin foil tray which are deep to do this. But bad luck....I couldn't find one and there was no one to go out and get one.
All I could find to take my biryani to the party was a big hotbox I had hidden in my cabinet. I surely couldnot layer it in that...I would not look good from any angle!!...
For that reason, I mixed the layers up to look uniform all over. Garnished with coriander leaves, took it to the potluck.
Well I guess it did taste good, since it was almost done....and I was happy.
As for the pics....I layered it like I wanted it to look like in a small cup and turned it over, thats why it looks so good!!!
The whole process takes about an hour fifteen minutes. But its not at all difficult to do it!
Below I hope I wrote it out as you can understand it....If not surely ask me questions.

Two ways to do it:

1. Cook rice completely as you wish, and layer it for easiness sake.
2. Cook rice to 90%, drain water completely, layer and bake in oven preheated to 375 degrees for 20 min or until cooked.


Ingredients:

4 cups uncooked basmati rice

Whole Garam Masala for rice

4 elaichi
4 cloves
2 pieces cinamon
1 tsp shahi jeera
1 tsp jeera
2 bay leaves
2 anise star petals
salt to taste
1 tsp oil

For Gravy Curry

6 elaichi
6 cloves
4 peppercorns
3 pieces of cinamon
1 tsp shahi jeera
1 tsp jeera
4 bay leaves
2 anise stars
cashew nuts as required

1 tbsp ginger garlic paste
1 small onion, chopped small
2 tomatoes, chopped
1 can tomoato puree, 10 oz
5 green chillies, slit

2 small potatoes, cubed
1/2 cup peas
1/2 cup chopped carrots
1/2 cup cauliflower florets
1/2 cup beans, chopped
1/2 cup yogurt, blended with some water
paneer cubes, as required shallow fried in oil
1/2 cup mint leaves, chopped
1/2 cup coriander leaves, chopped

Salt to taste
1/2 tsp turmeric powder
3-4 tbsp oil

For Garnish:

1/2 cup onion, preferably red, cut lengthwise
1/2 cup coriander leaves, chopped


Method:

Rice:

Wash and soak rice for atleast 30-40 min.
Boil about 10 cups of water.
Add the whole garam masala, oil and salt. When it boils, add drained rice.
When the rice starts to boil and 'dance', check to see it its 90% cooked.
Drain the water.
From here you can go either way -- drain water, cover and cook, till completely cooked or layer it with the gravy, cover and cook in the oven.

Gravy:
Heat oil in a big pan.
Fry paneer pieces in shallow oil and keep aside.
Fry cashew nuts to golden brown and keep aside.
In the same oil, put all the whole garam masala, saute for a minute.
Add the onions and saute till translucent.
Add the ginger garlic paste and fry for a minute.
Add the tomatoes and green chillies and cook till soft.
Add the tomato puree and cook for 5 minutes, till you see oil separating.
Add the potatoes first and cook for couple of minutes. Next add the green beans, carrots, cauliflower and green peas. Add turmeric, salt, cover and cook till cooked and not mushy.
Add the blended yogurt and mix well. Cook for another 5 min.
Add in the chopped mint and coriander leaves.
Add the fried paneer cubes, cook for another 5 minutes.

If using completely cooked rice, add the cashews, onion slices to the gravy and remove from heat.
If using 90% cooked rice, add cashews and onions while layering.

Layering:

Add one layer of cooked or 90% cooked rice to the botton of the tray.
Add the gravy next. Add the cashews and raw onion slices.
Add the next layer of rice. Top with chopped coriander leaves.
If using 90% cooked rice. Cover and cook in pre-heated oven until cooked.
If you want you can sprinkle saffron colored milk on the top.

Garnish and Serve warm with side dishes of you choice.
Enjoy!!!


Check out all the wonderful bloggers who are taking part in the blogging marathon for the next 7 days along with me.

 Srivalli, Azeema, Bhagi, Champa, Gayathri Anand, Gayathri Kumar, Harini, Jay, Kamalika, Meena, Mina, Padma, Pavani, PJ, Priya Mahadevan, Priya Suresh, Priya Vasu, Rujuta, Santosh, Saraswathi, Savitha, Shanavi, Sowmya, Suma, Usha, Veena


Monday, January 31, 2011

Murg Keema Pulao / Ground Chicken Pulao


10 more days to go for the event to end on my blog....so please send in your entries....I haven't got many as yet and I am eagerly looking forward to seeing your entries and who will win the awesome book by Raghavan Iyer.
So pleasee  send in your entries...time is running out fast.....
For details check out the side bar 'ON GOING EVENT'

So atlast my light box has been made. Thanks to my hubby in helping me. I am very happy how the pics are coming out. So since I was busy making my light box, I needed something easy to make and I decided on this pulao, so that I wouldn't have to spend much time on my cooking that night!

If you would ask me which Keema I like most?? I would say ground Mutton or Lamb keema.
Chicken keema is just a substitute as my kids prefer that better over Lamb.
Well that surely makes it easy and cooking chicken keema is very easy.

Anything cooked with chicken keema can be done in very less time, like this chicken Pulao. It came out yummy and was very easy to make.
I made this last week night for dinner. An wholesome one pot meal, quick to make and was enjoyed by all of us.

I made this by mixing the soaked rice with the chicken keema, the spices and letting them cook together.
This can also me made the same way with ground lamb or mutton keema.
Since ground keema is chopped so tiny, it doesn't take much time to cook completely.


Ingredients:

3 cups basmati rice (soaked for 30 min)
4 1/2 cups water

1 lb chicken keema or ground chicken
1/4 cups broken cashews
1 large onion, chopped lengthwise
5 green chillies
3 small tomatoes
2 tbsp ginger-garlic paste

Whole garam masala:

6-8 cloves
3 1in pieces of cinamon stick
4-5 bay leaves
6 elaichi or cardamom pods
1 anise star
1/2 tbsp jeera, cumin seeds
1 tsp shahi jeera or kala jeera

Powders:

1-2 tsp coriander powder
1-2 tsp jeera powder
1-2 tsp garam masala powder
1-2 tsp chilli powder
1/2 tsp turmeric powder

1/2 cup chopped coriander and mint, pudina leaves
salt to taste
2 tbsp oil
1 tbsp butter

Method:

Wash rice and keep aside soaking in water for atleast 30 min.
Heat oil in a big pot. (I used the biggest pot in the utensil set you get...I think its 5 quart pot with a tight lid)
Add all the whole garam masala and saute for a minute.
Add the onions and green chillies and saute for a minute.
Add the ginger-garlic paste and saute for few seconds and add the ground chicken.
While the chicken cooks, try breaking it up into small pieces.
Add the tomatoes and let them cook with the chicken for 5 minutes.
Add all the powders to the chicken and incorporate well into the chicken. Add Salt accordingly.
Drain the water from the rice and add the rice to the chicken. Saute it for couple of minutes by folding in slowly and try not breaking the rice.
Add the 4 1/2 cups of water and let this come to a boil.
When it starts boiling, slowly all the water gets absorbed by the rice, till then leave it uncovered.
When most of the water is gone, add the butter chopped in small pieces on the top along with chopped coriander and mint leaves, mix a little and cover it to cook on low heat.
It will take atleast 15 -20 minutes for it to be fully cooked after this point.
Serve hot with raita or any curry. A hearty one pot meal is ready.
Enjoy!!!