Tuesday, March 29, 2011

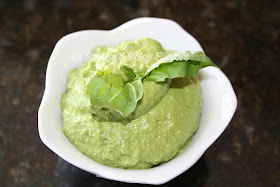
Basil - Walnut Pesto


Here is a recipe for Basil walnut pesto which I had bookmarked long back from Food.com
I needed pesto to make a Mediterranean pizza which I ended up making this past weekend.
Usually pesto is made with pine nuts, but I don't buy much pine nuts and so instead I needed a recipe in which I could use something which I had at home. I found this easy recipe and it came out awesome. I made it using walnuts, which usually are there in my pantry and who can say no to walnuts? They are rich in good fats and very good for you. They come under the category of foods which have good omega fatty acids.

So here is the recipe from Food.com. I made it exactly the same with no changes. It tasted awesome on the Mediterranean pizza, which I will post soon.
You can use a food processor or a blender to make this.

Ingredients:

2 cup basil leaves, chopped
1/3 cup olive oil
1/2 cup chopped walnuts
2 cloves of garlic, chopped
1/2 cup grated Parmesan cheese
2 tbsp softened butter (optional, but using it makes it creamy and smooth)
1/2 tsp salt

Method:

Blend together the basil leaves, olive oil, walnuts and garlic, till smooth.
Add salt, Parmesan cheese and butter and blend further till smooth, about 10 seconds.
The pesto is ready. Use it in your favorite dishes. For use with pasta, add couple of tbsp of hot pasta water, so that it will blend nicely with the pasta.
Enjoy!!!


Sending this to Aipi's Bookmarked event - Every Tuesday

Monday, March 28, 2011

Beerakaya Endu Royyala koora , Ridge Gourd with Dried Shrimp


If this was India, this dish would be cooking in our house every week or at least one every other week.
Dried seafood has its own place when its comes to cooking. If you ever tasted it, you would surely fall in love with it. I love both dried fish and dried shrimp. There are lots of varieties you can get. In Fish, you can get both big fillets to small whole dried fish. Same in shrimp , you can get big, small and even royya pottu, which is dried shrimp skin. A little of this goes a long way when it comes to taste. They are already salty, so remember that when adding salt to your dish!

Here in US, we can get dried shrimp or fish in Asian or even in some Indian grocery stores.
This dish can be made with any veggie like, ridge gourd, eggplant, green plantain etc.,.
Its very easy with very less number of ingredients, all you need is ginger garlic paste, onions and chilli powder. :)) and you get this amazing dish which goes totally yum with hot rice or even with chapathis.
This dish can also with fresh shrimp instead of dried shrimp.


Ingredients:

1/2 cup dried shrimp
2-3 ridge gourds, beerakaya (depending on size), chopped into small pieces

1/2 tbsp oil
1 tbsp ginger garlic paste
few curry leaves
1 small onion, chopped
4 green chillies, chopped
1/2 tsp turmeric powder
1 tsp red chilli powder
salt to taste
Chopped coriander leaves for garnish

Method:

Wash the dried shrimp in hot water and soak for about 10-15 min.
Heat oil in a pan.
Saute onions and green chillies till translucent.
Add the curry leaves.
Add the soaked shrimp and saute for 2-3 minutes.
Add the chopped ridge gourd and some salt.
(Remember that dried fish or shrimp is salty, so add accordingly. You can always add more later but cannot remove)
When the ridge gourd wilts and gets half cooked, add the turmeric and chilli powder.
Cook until most of the water shedded by the ridge gourd is gone or dried up.
Garnish with chopped coriander leaves.
Serve with hot rice or chapatis.
Enjoy!!!


Friday, March 25, 2011

Lots of awards and a Tag

Over the last couple of months I was generously showered with awards and me, being so lazy, posting all of them only now!! Sorry guys!!

I Thank each one of you and also all my readers and commenters for your continuous support. This is the best place I could ever be. All the new friends I have made over the months and those who have become my good friends, here and on facebook!
Thank You guys!
New people I have met through the blogging marathons and new blogs I come across everyday, I love reading all your blogs and enjoy them thoroughly...tho I don't leave messages on each blog, due to time constraints and other obligations, I do go thru each blog which I follow in my reader, whenever I get time!!
All the effort and time put into this blogging world is totally appreciated and a wondrous job!

Here are all of them. If I missed out on any, I am sorry! Just let me know!!!

So coming to the awards -- These awards were given to me by the following friends...please to visit their wonderful blogs and check out whats cooking in their kitchen!

Harika of Harika's Kitchen
Minu of Chettinad Fiesta
Archana of The Mad Scientist's Kitchen
Vimitha Anand of My Culinary Trail Room
Krithi of Krithi's Kitchen
Reshmi Mahesh of Fun with Fud
Priya Srinivasan of Enveetu Kitchen


Above Awards and Tag from Uma of Trendy Relish


Participation award from Kurinji of Kurinji Kathambam


Coming to the Tag, I have to share 7 facts about me.....I already wrote about it in my January's post....You can read about it here. All the 7 things about are there and nothing's changed :))))

I am passing all these awards and the tag to all my readers and followers, please feel free to pick them up and put them in your blog....I wouldn't be here if not for you guys!! Thank you muah muah xoxoxo!

But since I have to choose 15 bloggers...here goes!

Divya of Divya's recipes

Priya of Now Serving

Vijitha of A Foodie n her Cooking Hat

Rachu of Amma and Baby

Devi of Devi's Blog

HGourmet Foodie of Healthy Gourmet Food, Cooking and Tips

Sravs of Srav's Culinary Concepts

Priya Sreeram of Bon Appetit

Krithi of Krithi's Kitchen

Harika of Harika's Kitchen

Tahemeem of Not So Gourmet

Plateful of Plateful

Savitha of Savitha's Kitchen

Shanavi of Kitchen Secrets

Prathibha of The Chef and Her Kitchen

Wednesday, March 23, 2011

Chicken enchiladas ~ Semi Homemade


Enchiladas is one of the common dishes I order at a Mexican restaurant. What I like about it?...everything....I like the sauce they pour over it, the cheesiness, the sides....

At home, I usually end up making chicken enchiladas, but you surely can make vegetable enchiladas, using sauteed mushrooms, green pepper, asparagus, zucchini etc., and I am telling ya....its yum! Had that once at a restaurant and it was fantastic! Or try it with minced soya nuggets or granules.

I have made chicken enchiladas mainly using all the store bought sauces, to make life easy by just assembling them together and you get a perfect semi-homemade enchiladas, without even spending much time on it!

I used ground chicken, but you can surely use pulled chicken from rotisserie, if you like chunky pieces. And the whole process would be same, only since the rotisserie chicken would be already cooked, cooking time would be less.

I like using the McCormic enchilada sauce mix packet, by which we can make the red sauce without any hassle. For the green sauce or salsa verde and chunky salsa, I used the bottled Pace and Herdez sauce. Please feel free to use any sauce you like and prefer. Thats what makes it taste yummy and hearty too!

To make it more healthy, use corn tortilla instead of the flour tortillas. It gives a unique taste and much much more healthier for sure.
Serve with Mexican rice, guacamole or with any salad to get a perfectly put together meal.
Go easy on the cheese or add no cheese if you don't prefer it too much!
I added only black beans, but you can add bell peppers, corn or any other veggie you prefer.


McCormick enchilada sauce requires:

1 1/2 cups water
8oz tomato sauce

Method for sauce:

Whisk the tomato sauce, water and the enchilada mix together. Bring to a boil and simmer for about 5 minutes.


Ingredients for Chicken:

1lb chicken
1/2 cup black beans and corn (I didn't have corn, but I wish I did) (canned or frozen)
2 oz tomato sauce
1/2 cup enchilada sauce
4 cloves of garlic, chopped
1 tsp chilli powder
1 small onion
coriander garnish
salt to taste
pinch of turmeric (making it indianized)
1-2 tbsp of oil
chopped coriander leaves

Method for ground Chicken:

Heat the oil in a open pan.
Saute the onion and chopped garlic.
Add the chicken and saute for 5 minutes with salt. Break it down as much as possible.
Add the tomato sauce and enchilada sauce. Cook for 3-4 minutes
Add the chilli powder and turmeric. Cook for 3-4 minutes.
Add in the black beans and corn. Cook for 5-6 minutes
Cook till everything comes together and no gravy is left.
Add in the coriander leaves.
Mix well. Remove from heat.


Ingredients for Enchiladas

Cooked chicken curry (as above)
8-12 flour tortillas
(I used 8 flour and 2 corn tortillas)(Using corn is optional, I made that especially for myself)
salsa verde, store bought
chunkey salsa, store bought
Shredded Mexican cheese
9x13 in baking tray or dish

Method of assembly:

Pour salsa verde, just to coat the bottom of the tray.
Add little bit of chunky salsa.
Heat the tortilla about 10 sec.
Coat it with the enchilada sauce.
Put chicken in the center.
Roll it and place carefully in the 9x13 inch baking dish.
Repeat same with others, even the corn tortilla if using that.
Pour the remaining enchilada sauce on top of the rolled tortillas.
Sprinkle required amount of cheese on the top
Bake @ 350 for 20 minutes.
Remove and serve hot with mexican rice, guacamole, salad or as is.
Enjoy!!!


Tuesday, March 22, 2011

Mexican rice with black beans


When ever we go to a mexican restuarant, I will choose a dish which surely will have the mexcian rice on the side. It is so good with simple flavors and makes for a perfect side dish. Not that I don't like the cilantro rice from Chipotle. I am in love with that rice too and make a quick recreation of that when ever needed with leftover rice. I have even tried it with brown rice and I thought brown rice tastes much better with little lemon and cilantro.

Coming to the mexican rice, its usually is the side dish to many entrees in a mexican restuarant! Its a simple tomato rice with garlic and little cumin powder, gives it just enough flavor not over powering the other items in your plate.

So here is the recipe for mexican red rice. I added black beans, just so that the rice would be just as good when eaten alone!...tho I would eat it anyways plain or with black beans. Its just a perfect side dish when you make quesadillas or anything mexican. It is so easy to make and I am sure you guys will love it too!


For rice:

1 cup uncooked basmati rice or long grain (I used basmati)
1/2 cup black beans (optional)
2 green chillies
2 cloves of garlic, sliced
1 small onion chopped
1/2 cup tomato sauce
1/2 tsp ground cumin
1 - 1 1/2 cup water (depending on your rice, I used 1 1/2 cups)
salt to taste
lemon juice to taste
coriander leaves for garnish
1 tbsp oil

Method:

Heat oil.
Add the garlic, do not brown.
Add in the rice and fry for about 2-3 minutes till toasty.
Add salt and cumin powder.
Add the onions, black beans and green chillies.
Add the tomato puree and water. Mix well and check for salt, add more if required.
Let water come to boil till absorbed. Cover and cook till completely cooked.
Fluff the rice. Add the lemon juice and chopped coriander leaves.
Serve as a side dish to any mexican dishes or eat it plain! :)
I served it with chicken enchiladas. Enjoy!!!

Monday, March 21, 2011

Fresh Raw Ginger Chutney / Pachchi Allam pachadi


Hi Everyone! How is everyone on the first day of spring?....enjoying the weather I hope!

But no luck for us....snow and ice are predicted in the forecast!...ahhh what a start to the first day of spring....actually I can't wait for spring to come....fresh new leaves and flowers...I look forward to watching all kinds of flowers, mainly, kids happily playing outside (less noise and only peace in the house :)) Kids I tell ya are always gonna be kids! :))

Anyways, I wish you guys are having better luck and enjoy the weather.
Wishing everyone a belated Holi!! hope everyone enjoyed a lot in good weather that is! :)

And wasn't the super moon just gorgeous on Saturday! I always like the moon following me while driving and that day is was exceptional! Loved it totally!....clear skies and no snow!!....ahhh snow snow go away...come again next year, Now let the spring take your place! :)

So fresh it is!....Lets start the first day of spring with fresh ingredients and ginger being a good healing food so many good stuff, here is a Fresh Raw Ginger Chutney.
Very simple to make and goes good with almost anything....Idlis, dosas, hot rice with few drops of ghee and especially with Pesarattu, green Moong daal dosa.
Try it and I am sure you will love it!
I add a little bit of jaggery to cut the heat from the ginger. Use it in moderation, only as much as you think will be necessary. Don't add all at once. Add little by little!


Ingredients:

About 1/4 kg ginger, allam
2 green chillies
2 tbsp jaggery, belam (more or less)
1 tbsp channa daal
1 tsp urad daal
2 dry red chillies
1 tbsp oil
1/4 tsp mustard seeds
1/4 tsp jeera, cumin
pinch of hing or inguva, asfoetida

Method:

Peel and wash ginger. Chop into small pieces.
Heat 1/2 tbsp oil.
Add the channa daal and urad daal, let them brown.
Add the green chillies and red chillies.
Add the ginger and saute for 3-5 minutes.
Grind everything together with the jaggery.
Heat the other 1/2 tbsp of oil.
Add mustard and jeera to it. Let them splutter.
Add the hing. Add this to the ground ginger paste. Mix well.
Serve with idlis or dosas...Goes especially good with pesarattu, green moong dosa.
Enjoy!!!


Thursday, March 17, 2011

Super Soft Idlis with Flax Seeds / Steamed Rice cakes with Flax seeds


I made these like couple of weeks ago...wanted to send it to an event but never got around to posting it on time.
So here I am today with this healthy idlis post :)
Idlis and dosas are a common part of our regular diet. My kids love them and I make them regularly as breakfast.
Idlis, tho are healthy as it is since they are steamed....making them more healthy is making the most of it.
I have seen many people around the blogosphere using flax seeds or flax seed meal and decided to give it a try. Whats better than increasing the fiber intake in our regular diet!

Flax seeds are full of fiber. They donot have any special kind of taste, so the kids cannot really notice anything different. When added to the idlis, they do come out brown in color. My kids didnot mind having there super soft brown flax seed idlis.
But always remember to have lots of water with the intake of increased fiber products to avoid related troubles ;)


Ingredients:

1 cup urad daal, minapa pappu
2 cups idli ravva
2 1/2 tbsp whole flax seeds
salt to taste

Method:

Wash urad daal and soak in enough water along with flax seeds.
Wash and soak idli ravva.
Soak these over night or atleast 6-8 hours.
Grind into smooth paste and keep for fermentation overnight.
You can add salt before or after fermentation.
Grease a idli mould plate with oil lightly and pour in batter.
Steam without whistle in a pressure cooker or in a idli cooker for about 10-15 min.
Remove and Serve hot with chutney of choice. Enjoy!!!


Tuesday, March 15, 2011

Suruttai Poli ~ ICC


This Febuary's ICC (Indian Cooking Challenge), started by Srivalli. She chose Suruttai Poli, recipe for which she recieved from her friend and fellow Blogger Nithya's Mom.

The name poli, had me confused until I read the technique and recipe for it.
Its more like a stuffed and rolled poli, the poli is used for the rolling.
It sounded and turned out more like a kajjikaya. But Kajjikaya are deep fried after stuffing, here the poori is fried before, then stuffed and rolled. So there is a huge difference.:))

I like it nutty with all the nuts, thats why the change the stuffing a bit and added all the nuts to make it nutty!
Below I gave the original recipe and also my recipe of ingredients. So please use which ever you wish. I am sure you will enjoy both, cos both of them taste equally good and yummy!
I added only 1/2 cup sugar, which I found was enough sweet for me, but if you like it more sweeter, please add some more.
I fried one poori, rolled it quickly before fring the nexr one...thats better so that they don't crisp up and are flexible!


Ingredients:

Dough for Poli: (papad, appadam, appalam)

1 cup Maida, All Purpose Flour
pinch of salt
water for kneading

Oil for deep frying

Method:

Knead all ingredients together into a smooth pilable dough. Keep aside for 30 min.
Roll out into thin, papad like pooris. Leave aside on a paper for about 10 min.
They should be very thin, so that they shouldn't puff up like a poori when fried in oil. They can have bubbles here and there but they shouldn't be like a puffed up poori.
Makes about 12-15 small pooris, depending on the size.


For stuffing:

The recipe asks for:

1 cup roasted gram, fried channa daal, putnala pappu, chutney dal
1 cup sugar
20 pieces cashew nuts, broken
1 tsp cardamom powder
1 tbsp scarpped coconut
1 tsp ghee


My changes to the ingredients:

1/2 cup fried channa daal, roasted gram
1/2 cup sugar
1 tsp cardamom powder
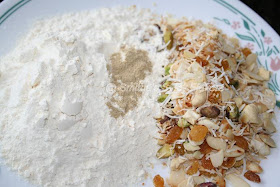
1/2 cup mixed nuts (pista, slivered almonds, broken cashew, golden raisins (Kismis))
3 tbsp dry grated coconut


Method for stuffing:

Grind together roasted gram and sugar in fine powder.
Mix with cardamom powder and mixed nuts along with dry grated coconut.


Assembly:

Oil should be on medium to low heat. When you drop a small piece of dough, it shouldn't immediately come up.
Fry the pooris in deep oil.

They should only fry for about less than 10 sec, only till you see bubbles and the poori is half fried.

Drain the oil and remove immediately and place on paper napkin. If you think its oily, dab it with paper nakin lightly, not completely. If you dab them completely, they will not crisp up.

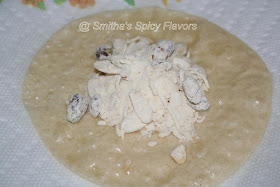
Put about a tablespoon or 2 of the stuffing and roll it. Roll it with sides inside first and then from bottom to top, with the seem facing down.
Leave it on the paper napkin untill it cools and crisps up.
You will have to work with the poori quickly, so that it doesn't crisp up before you roll it.

I garnished it with coarsely powdered pistachios and kesar (saffron).

Serve as a snack or a dessert. Enjoy!!!

Wednesday, March 9, 2011

Yummy Pizza Sandwich


Our final day of the blogging marathon....thanks to all of you who come, read, follow and comment. And also all the friends I have made thru this marathon...A Big Thank You guys!!!

For the last day of our blogging marathon, here is a sandwich which I have always enjoyed as a kid and to this day enjoy it with my kids.
It used to be snack which my Mom used to make after school, but it has always been our favorite as kids and now I make it only as a snack but also when ever we feel like it or as quick lunch. My old one loves the spiciness...he doesn't want all veggies but likes all the cheese! :))

We call it 'Pizza Sandwich'. But mind you nothing traditional goes into this sandwich....
You are allowed to make it the way you like it!

I use Maggi 'Hot and Sweet' for it taste...but if you like some other sauce, use that.
Pinch of vamu, ajwain, carom seeds, gives this sandwich the KICK!!!...you will know when you make it!!

A good crusty bread will be nice if you are using the panini grill, but you surely can use any soft bread....sandwich maker it best for soft bread....but grill is fine too!!

(The pics aren't that good...was in a hurry to eat it!...will put new ones soon)

Ingredients:

2 slices of good bread (I like crusty bread, so I used whole grain, whole wheat brown bread) (soft bread if fine too)

Maggi hot an sweet sauce (or tomato ketchup)
pinch of vamu, ajwain seeds, carom seeds
chopped onion, tomato and bell pepper (or any other veggies you choose)
shredded cheese (I used mozarella)

Method:

Spread the maggi sauce on both the slices of the bread.
Sprinkle vamu on one side of the bread.
Arrange the veggies on the bread.
Sprinkle the shredded cheese on the veggies.
Close with the other slice of bread.
Grill in a panini maker or in a sandwich maker.
If you don't have either, you can toast it on the stove top, in a pan.
Cut into triangles and Serve hot!
Enjoy!!!


See what my fellow marathoners have cooked up for the last day...

Champa,

Divya,
Gayathri Anand,
Gayathri Kumar,
Monica,
Padma Dharmaraj,
PJ,
Savitha,
Srivalli,
Usha,
Veena Aravind,