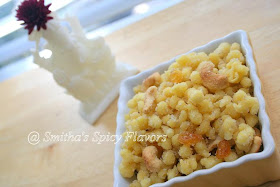
Wednesday, November 30, 2011

Baked whole wheat carom biscuits / Baked Limkilu / Baked Diamond cuts


Days are just flying by, can't believe it already December 2011. I remember Jan 2011 like it was y'day. Now its already December. Where did all the months go?
Well there surely were some major changes this year for me. Still getting used the newness of this place. Do not know when I will wholly get used to this place!

With the winter coming upon us, there are times when you need something to munch on...something crispy ...if you are like me....salty the better. I do like sweets but, surely I love to munch on something salty more.
This is a simple recipe which I modified from the original recipe I had. The original recipe is called "Limkilu" and are deep fried, made of all purpose flour.
Here the modification is that, its made of whole wheat flour. Instead of using butter or ghee completely, I used vegetable shortening. And best of all, its baked like crackers, instead of deep fried.


Ingredients:

2 1/2 cup whole wheat
1/4 cup or 4 tbsp vegetable shortening
1/4 cup or 4 tsp butter
1 tsp baking powder
1 tsp chilli powder
1 tsp carom seeds
salt to taste
1 tbsp yogurt
warm water to knead
Olive oil to brush

let it rest for 10 min

bake @ 350

Method:

Pre-heat the oven to 350 degrees F.
Mix all the top ingredients together to form a soft dough. Let it rest for 10 minutes.
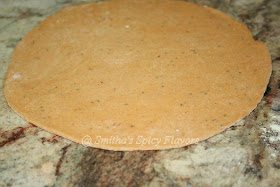
Roll it out to a thin chapathi. Using a knife, cut into squares or diamonds shapes.
Bake in the oven for about 10-12 minutes, turning over once and brush lightly with olive oil on both sides.
Remove when browned. This shouldn't take another minute or two.
Serve when cool. Store in an air tight container. Will keep good for a week to 10 days.
Enjoy!!!


Friday, November 18, 2011

Appalu...different version / Fried flat sweetened dough


As the days get shorter, I get lazier is probably in the correct ratio!...well not really, but still so many things to do and shopping ;) has been keeping me away....I am trying to click pictures before the sun goes down and that's a real pain....as I don't have my light box made (again) as yet...which maybe now since its a sign, by the sun setting so soon, that i should go ahead and make one again!.....only problem is where can I keep it safe, without my kids getting to it!!....IN THIS TINY HOUSE!!!

Coming to the recipe, this is also one of the naivedhyam offered to God for Lakshmi Pooja. It is kind of different since it has rava, maida and coconut, and most of all its deep fried.
What doesn't taste good when its Deep fried!!...I am sure Gods love it too! :)
Anyways...the fresher the dough made...the better, so that it doesn't fall apart in the oil.
Kneading the dough well also helps in not falling apart.
The traditional way for this to be made is deep frying, but if you don't want to, then surely try the shallow fry. Just brown it on both sides.


Ingredients:

1/2 cup ravva
1/2 cup maida, all purpose flour
1/2 cup fresh coconut, grated
1/2 to-3/4 cup bellam, jaggery
pinch of cardamom powder
1-2 tbsp ghee, neyyi
water to need to dough

Oil for Deep frying

Method:

Roast the rava, for 2 min.
Mix this with maida, freshly grated coconut, grated jaggery, elaichi powder and neyyi.
Use slightly warm water to mix...and knead for a aleast 5 mins. Keep aside for 10 minutes.
Heat oil in a kadai or if shallow frying, in a open pan.
Take small pieces of the dough, flatten it in yor palms, using tiny bit of ghee or oil.
Fry till they are golden brown on both side. Remove onto a paper napkin.
Serve as Naivedhyam, serve warm if possible.
Enjoy!!!


Monday, November 14, 2011

Sweet Boondi / Sweet crunchy petite balls


In my house, almost all of us will first go for any hot and spicy eatables rather any sweet stuff. My kids are now only starting to like some of the Indian sweets and are willing to try them out.

For that reason, I usually prepare spicy snacks more than sweet ones.
When I was making sweets for Diwali, I wanted to make something which would be easy and also easy to eat and something which they already know kind of thing....

I am sure we all know and have eaten sweet Boondi at one point of time in our life but the kids probably only know Boondi Ladoo and not the simple version which is the sweet Boondi.

That's the reason I went on to make Sweet boondi and it is very easy to make and takes about an hour from start to finish.
The sweetness and aroma of the saffron strands and cardamom powder makes this a very tempting and addictive snack.
This is also sometimes served as naivedyam and prasadam in Temples. So what are you waiting for, go ahead and try it out!


Required: a Boondi Ladle
Ingredients:

1 cup besan
1 cup rice flour
pinch of baking soda
warm water to make into batter

Oil for deep frying

1 cup sugar
1/4 cup water
pinch of saffron strands
pinch of elaichi

2 tbsp golden raisins
2 tbsp cashews or cashew halves
ghee for roasting the cashews and raisins


Method:

Mix the ingredients together with some warm water into a thick batter.

When oil is hot enough, Use the regular ladle to spoon some batter onto the boondi ladle.

Use the regular ladle to make circular motions on the Boondi ladle so that the batter drops as balls into the oil.

The batter, when in oil, will puff up into balls. Fry for minute, not till they are totally crunchy or brown.

Remove onto paper napkin. Make all the boondi with the rest of the batter.

Make sugar syrup in a wide pan with the sugar and water. Let it boil until it comes to one string consistency. Add the cardamom powder and few strands of saffron.

Add the Boondi and mix well to get all of them coated. They also absorb the syrup and become dry when cooled.

Fry the cashew pieces and raisins in a bit of ghee to golden brown and add to the sweet boondi.

Note: Refer to the post Spicy Boondi on how to make the boondi.


Wednesday, November 9, 2011

Twist on the traditional 7 cup burfi / Almond Besan burfi


Its been kind of a busy few days after Diwali....and also it seemed like a good time to take some rest :)
Now as more and more holidays are coming our way, its time we dish out more sweets and entertain more friends...I am talking about Thanksgiving and Christmas Holidays....Ya they are right around the corner and kids will be home too...

Most of the sweets which I had made for Diwali are almost over, but I didn't find time to write about them, so I will post them...keep a eye on that...
And since its time to again entertain...you can feel to make these sweets for your awesome guests and I am sure they will love them! :)

Here is a quick and simple sweet, something like Mysore Pak, and something like 7 cup sweet burfi. That's why I said a twist on the traditional 7 cup burfi :)...basically I used the same type of ingredients with 1 or 2 being different to come up with the 7 cup ratio.
Its quick and easy  to make and it may take anywhere between 30 to 45 minutes from start to finish.....so its surely is easy right!!!
My kids loved this and the mysore pak I made, will post mysore pak soon....and they were gone in a week. They can be stored for about 10 days in a air tight container.


Ingredients:

1 cup almond powder (I powdered some almonds as required)
1/2 besan
1/2 oil
1 cup ghee
2 sugar
1 cup milk
1 cup grated or powdered coconut (I used grated)
pinch of elaichi or cardamom powder

Method:

Grease a pan or tray or plate on all sides and keep aside.
Boil some milk in a heavy bottomed pan.
After it comes to a boil, add sugar and let it completely melt and keep simmering till the milk and sugar thicken to a one string consistency. Add in the elaichi.
Add the besan slowly so that it does not form any lumps. Stir in well.
Add the almond powder slowly as not to form any lumps. Mix in well.
Add the grated coconut and mix in well.
Slowly add the oil and stir it in so that it is well incorporated into the mix.
Then add the ghee or clarified butter, 1 tbsp at a time, so that it gets well incorporated.
Keep stirring until the whole mix leaves the sides and bubbles on the sides.
Remove onto the greased plate. Pat it down and even out the thickness.
Let it cool for 5 mins before cutting into it and making shapes.
Let it cool completely before you can break it into pieces.
Can be stored for couple of weeks in a air tight container.
Serve and Enjoy!!!